Image Source: Google
When it comes to transforming the look and feel of your home, one of the most impactful changes you can make is installing new exterior doors. Not only do exterior doors enhance the curb appeal of your home, but they also improve security and energy efficiency. If you're considering upgrading your exterior doors, this step-by-step guide will walk you through the installation process.
The first step in installing new exterior doors is to carefully measure the opening where the door will be installed. Make sure to measure the width, height, and depth of the opening to ensure that your new door will fit properly. It's also important to consider the swing of the door and the location of any windows or other obstacles that may affect the installation.
Once you have the proper measurements, it's time to choose your new exterior door. There are many options to consider, including materials, styles, and finishes. Make sure to choose a door that complements the architectural style of your home and fits your budget. You can purchase exterior doors from home improvement stores, door specialty stores, or online retailers.
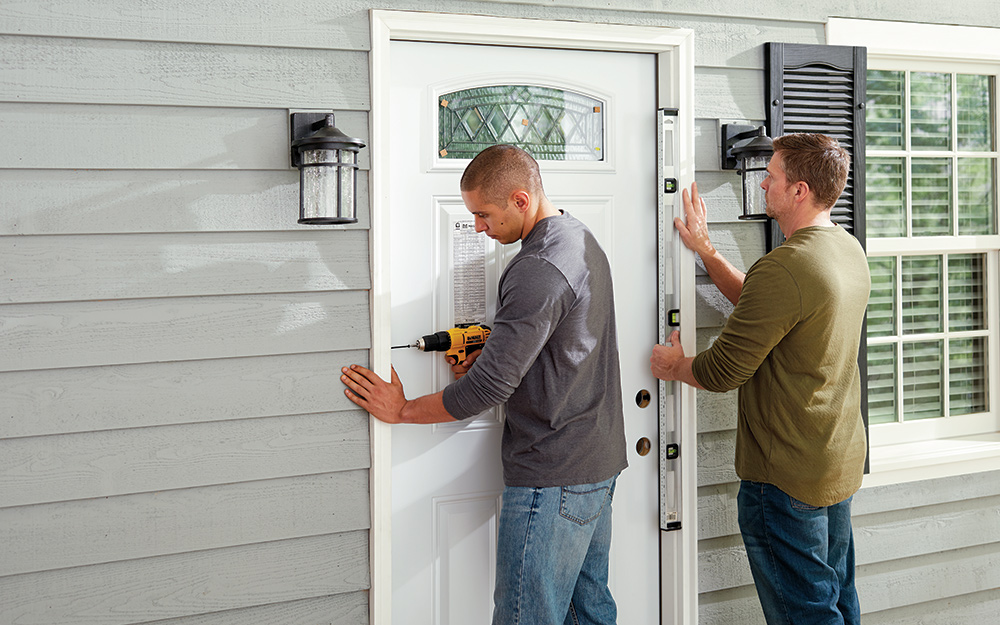
Before you begin the installation process, make sure to gather all the necessary tools and materials. You will need a hammer, screwdriver, drill, level, tape measure, shims, and a saw. It's also a good idea to have a helper to assist you with the installation process, as exterior doors can be heavy and difficult to maneuver on your own.
Once you have everything you need, you can begin the installation process. Start by removing the old door and hardware from the opening. Carefully pry off the trim around the door frame and remove any screws or nails holding the old door in place. Once the old door is removed, inspect the opening for any damage or rot that may need to be repaired before installing the new door.
Next, test fit the new door in the opening to ensure that it fits properly. If the door is too large, you may need to trim it to size using a saw. Once the door fits properly, you can begin installing it. Start by attaching the hinges to the door frame using the screws provided with the door. Make sure the hinges are securely attached and that the door swings freely.
Once the hinges are attached, you can hang the door in the opening. Have your helper hold the door in place while you insert shims around the frame to ensure that the door is level and plumb. Once the door is in place, secure it by screwing the hinges into the door frame. Check to make sure the door opens and closes smoothly before moving on to the next step.
Once the door is installed and all the hardware is in place, you can add the finishing touches, such as painting or staining the door and adding decorative elements like a wreath or house numbers. Step back and admire your new exterior door, knowing that you have not only transformed the look of your home but also improved its security and energy efficiency.